

I was looking back at all the crocheted crafts I've done and given away and I've come to realise that I've never made anything for myself. So with 6 balls of yarns I decided to make up a laptop sleeve for my baby macbook (That's my Christmas gift last year from my dear hubby!) There will not be any charts or specific measurements since laptops come in many sizes and thickness, you'd have to figure it out like I did. I have the basic concept figured out, the rest is up to you! LOL!
 For this laptop sleeve I used 6 balls of acryllic yarns (3 shades of pink x 2 sets). I wanted the sleeve thick so I combined the 3 shades of pink strands together. That's how you get the variegated shade.
 Your basic chain is very important. To measure the width of your base, you have to single chain 6 chain stitches shorter than the width of your laptop. That way, when you add the single crochet at the ends to build the rounds on your single chain, the fit will be just nice and snug.
  Close up of the round of single crochet on the last chain. Instead of the usual 6 single crochet on a chain to turn your stitches, I use only 4. This reduces the bulk on the end to create a slightly smaller base.
 Building your rows. Periodically test the fit by sliding your base onto your laptop to test the fit. If you find it loose, you may have to undo all your stitches and reduce the chains when you build the base again. I did that a few times, so remember the first rule : THE BASIC CHAIN HAS TO BE 6 CHAINS SHORTER THAN THE LAPTOP WIDTH!
 After creating the rows of single and nearing the end of the mouth of the sleeve I extended only one side of the sleeve to be folded over.
 Adding rows to the fold. Keep adding rows until you are able to cover the whole laptop and some over. Cut and secure yarn once you have the desired length.
 Start a row of Single crochet on the edges starting from one end of the cover to the other end.
 This is how the cover should look like before we slip stitch them together.
 Close up of the cover. Cut yarn and secure.
 IMPORTANT TIP : Invert the whole thing before you slip stitch the cover. This method will hide the edges on the inside and will eliminate pointed corners. (You can opt to handsew this part too.)
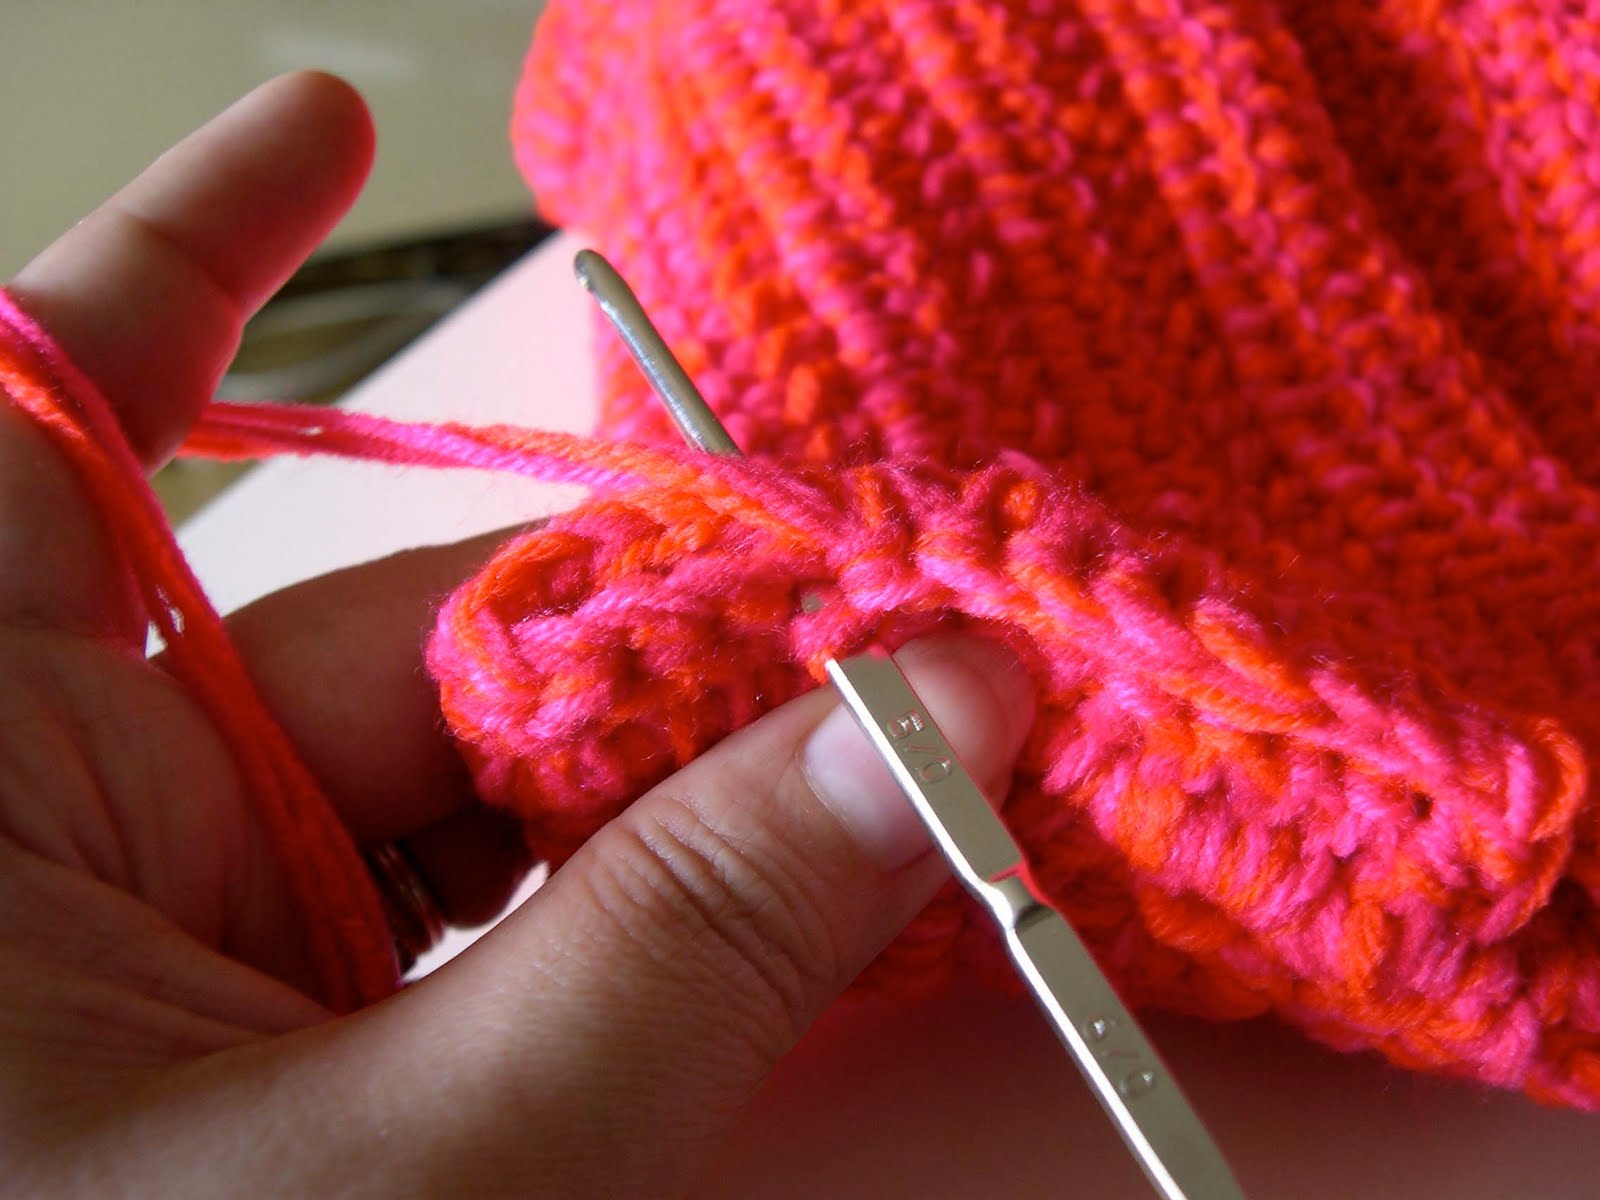 Close up of the slip stitch to secure the cover.
 Re-invert the sleeve cover and add desired buttons to secure the sides. Test the buttons to see if it can go through the gap created in your single crochet row.
 Ta-da! The completed sleeve. Now to embellish...
 See what I mean when you need to invert the sleeve to secure the cover. The corners are rounded instead of pointed.
 A zen-like quality. I thought stacking up these buttons was most relaxing.
  I tried a few combinations.
 Decided to use some felt flowers.
 Finally embellished!
 A peep inside. It's an easy peasy weekend project! Makes a great Christmas Pressie too!!
28 comments:
waw!! you inspired me sooo much!! i will start to make my own laptop sleeve as soon as i finish my final exam.. can't wait!! btw, tq sooo much for ur tutorial..
Oh I just love it. What a neat pressie idea.
I love this. I have been learning to crochet. It is perfect.
Nancy
So cute! Thanks for the tutorial! :)
Superb tutorial! :) Thanks so much for sharing.
thanks yonie, for the tutorial.. and i like the idea of combining 3 shades of pink strands together. now have to find where on earth my crochet hook & yarns.. hik hik hik..
I love it Mel...Well done...
Lovely! I've been looking for a laptop sleeve but now I can make my own! Thanks for the tutorial.
What a fun conversation piece, I love this! The playful colors and flowers are so cute. Thanks to much, I'll be linking.
Congratulations for the wonderful blog!
Anything you've done is very nice!
What a charming blog!=D
hello yoonie,,
i just read an article about ur blog in kosmo..hiii~
i think of learning to stitch after my exam.hii~
I just wanted to drop by and let you know that I’ve linked to gift tags/labels that you designed. The post is located here http://burdart.blogspot.com/2009/11/free-printable-artist-made-gift-tags.html There is also a text only post for slower connections just below it. Thank you for sharing your art so freely. I would love it if you would let me know if you have designed other tags or labels that should be included. And please, by all means, share this post. Stamp out store tags! ;)
Francie
What a lovely cover, but I haven't a lap top :((
thanks mel for the tutorial...not sure whether i can do this..u made it so simple...hehhee....
LOVE IT! just what I was looking for!
I'm a tad bit confused though...
when you start out, are you taking the stitches AROUND the base chain? I usually do the thing where you reach the end of the first row, flip it over, start a new row, flip that over then start a new one, and on and on. But that's not what it looks like you're doing here. A little bit of clarification, please :)
Another thing, when you "build up the rows," how do you get that rounded edge? do you continue you to go AROUND the chain here too?
I really want to make myself a laptop sleeve (cuz I think original ones are SO much cuter than the ugly/normal ones you can buy), but I only know basic crocheting. =)
Love this... :)
I LOVE this! Sooo cool and inspiring. :-)
I'm wishing you had a way to subscribe by email because yours is a blog I would love to follow!
I absolutely LOVE this and was so excited to make one for myself!!! Thank you so much for sharing this tutorial with us! I LOVE my sleeve! :-)
Here it is, if you'd like to check it out:
http://countrylifeinthebigcity.blogspot.com/2010/03/crochet-laptop-cozy.html
Thanks again!!!! :-)
di
You have many beautiful and creative creations on here! On will be back to visit again soon. ;-)
Since you used three strands of yarn, what size hook did you use? I'm thinking of using Lion Brand Hometown Super Bulky yarn.
Thanks for the pattern - love your blog! <3
Fantastic, exactly what I was looking for, a technique, not a rigid pattern. Thanks a million!
Love this tute. Love this project. Love the colors. Love the buttons. Love you! Thanks for the clear explanation of the beginning chain. I am doing a tapestry crochet in black and white skulls for my son-in-law. Now that I have my beginning count, I can plan the layout! Keep hooking! And posting.
I've just bought my DD a MacBook Pro and now want to crochet a sleeve for her. The first place I thought of to come for ideas is your blog. You didn't disappoint. Thanks a bunch, Mel.
P.S: Ah.... might need your help when I'm stuck. Lol!
You have really inspired me. I started doing mine yesterday and told several of my friends, who we crochet together, they cant wait to start on theirs too. I have been crochetting since I was a 13, and I had no idea that you could you more than one yarn to do projects. Thanks for the tips! =)
I truly like to reading your post. Thank you so much for taking the time to share such a nice information.laptop sleeves
Wow, nice one. Your post really encourage me to make this amazing cover for my notebook. I have recently collect Louis Vuitton agenda PM notebook cover for me but now I also want to make this one. Its very cute.
http://bit.ly/takashii
Its so cute!!!!!!! I love it!!!!!
Post a Comment